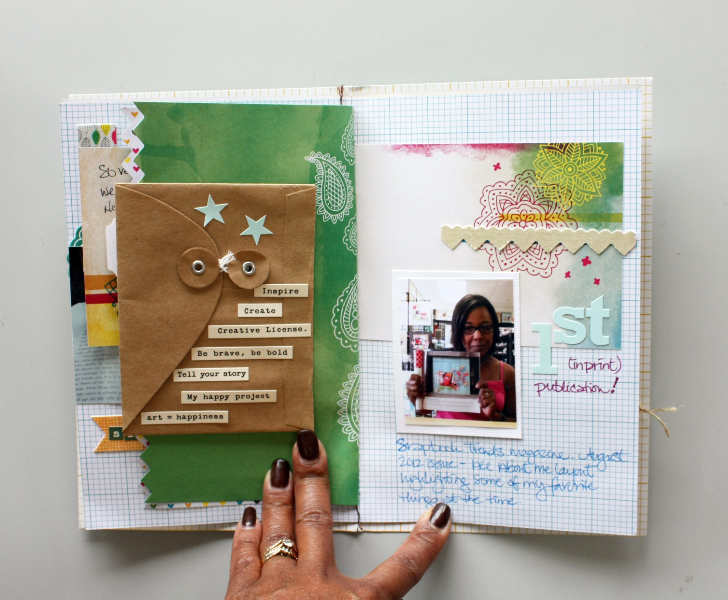
Good morning! It's Monday which means it's Inspiration Station time!
Inspiration can come to us in the weirdest places sometime. We can browse through scrapbooking magazines, look at sketches on Pinterest, search through layout albums and find ideas to fuel our next layout. Sometimes the inspiration is sitting on your kitchen table.
I love to read. I always have a stack of books on my nightstand. I recently joined a book club and the first book that I was asked to read was A House in the Sky by Amanda Lindhout. I just loved the cover. I just love the hexagons transforming into birds. I also liked the colors, the black, white and sand color. I decided to use it as my inspiration.
So here is what I created using the book cover as my sketch and pallet. Cosmo Cricket's Sweet Disposition collection was perfect for this project. I then added some Maya Road wood veneer butterflies, some Prima flowers and some CTMH epoxy bubble to complete the layout.
Now I challenge you to find inspiration in your everyday life. You never know, the inspiration for your next project might be sitting on your kitchen table right now.
Showing posts with label Cosmo Cricket. Show all posts
Monday, February 17, 2014
Thursday, February 6, 2014
Product Shuffle: Alphas!
Good morning!
Jocelyne here in the very first installment of LCOM'S Product Shuffle. How exciting! Every week, we will give a new twist to a popular scrapbooking product by using it in an unconventional way. The product we will be featuring in this week's shuffle is the very popular alpha sticker!
I simply love alpha stickers. I love how easy they are to use, just stick them on the page for a personalized title that gives color and dimension to a page. But they are also very versatile too. By simply thinking a little outside of the box, you can use alphas in more than just your titles.
Here is what I came up with using the very yummy Cosmo Cricket Sweet Disposition collection
Can you scope out the alphas I used? First, you can see the conventional way I used the word Chill. One of the downfalls in using alpha stickers, is running out of a certain letter. In my case, for this layout I had ran out of the letter L. Time to change title? No way! There is always a way to alter existing letters to make it work. For this layout, I was able to cut a P to make an L. I also used O's in this American Crafts Thickers to make the scallop border on the bottom of the page. I simply cut the O's in half and placed them one next to the other.
Now take a look at the word Selfie. I actually embossed the foam letter! Very easy! I simply placed the title letters on a piece of backing paper, placed them in the embossing folder and passed it through a Cuttlebug. Be sure to use the backing paper (like the one you peeled the sticker off in the original packaging) because once you pass it through the embossing machine, they will be virtually impossible to peel off if you use regular paper. I love the texture it gave my letter, almost mimicking the background paper.
Finally, I added some CTMH ribbon, some prima flowers, wood button and tag, layered some Cosmo Cricket Sweet Disposition stickers, some Simple Stories mini alphas and words, a few My mind's eye enamel dots and a few bows made with twine. And just to show how versatile those alphas are, I underlined the word chill and added dashes on top of my banner in the upper left hand side of the page. I even added an asterix in one the flowers and hid another under a paper flower to make a hint of a leaf. Go check out all the alphas you can find in the store and I challenge you to be creative with them.
Join us again on Saturday for a new Sketch it out! Have an awesome day!
Wednesday, October 3, 2012
Cosmo Cricket Tea for Two Layout
Hi everyone! It's Kate here today. I just want to share a Cosmo Cricket Tea for Two layout that I just created.I love the colours in this line.

Here is a close up of the embellishment cluster. I used a Silhouette America fold and tuck file for the border and the blue doily. This is one of my favourite cutting files.

Supplies
Here is a close up of the embellishment cluster. I used a Silhouette America fold and tuck file for the border and the blue doily. This is one of my favourite cutting files.
Supplies
- Cosmo Cricket Tea for Two Papers
- Cosmo Cricket Tea for Two Element deck
- Cosmo Cricket Tea for Two Ready-Set-Chip
- Cosmo Cricket Tea for Two Stacked Stickers
- Silhouette Cameo
- Color Shine Mists by Heidi Swapp
- Rhinestones by Prima
- Twine by Maya Road
- Pen by Faber Castell
- Adhesives by Helmar
- Carstock by Bazill
Monday, August 27, 2012
Amy Tangerine Day Book
The Amy Tangerine Day books have been hot sellers since the moment they arrived on the scene. Although I really liked the look of them I was hesitant as to whether or not I would enjoy working with them, as the pages are a much lighter weight than I was accustomed to. Needless to say as soon as I began filling the first page all hesitations were washed away. The album was incredibly easy to work with.
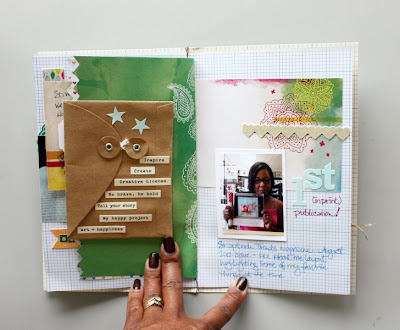
I decided to use it to do a 'Book Of Me'. Here's the finished album.
I apologize in advance for my hand being visible in many of the photos. Photographing this little guy proved a lot more tricky than putting it together :)
![]() |
| Click on the images to enlarge |
![]() |
| the envelope houses the acceptance email from Scrapbook Trends |
![]() |
| The game day ticket is peeking out behind the page |
I've mentioned before how important I think it is to scrap about ourselves in addition to our family and friends. This little book will serve as a reminder in years to come of all the rich blessing my life held at this point. It may seem to go against the grain to do a BOM album in the middle of the year, but that's me, that's how I roll, and I find great freedom in scrapping whatever my heart desires, and not restraining myself to chronological order, or standard timelines.
If you struggle with mini albums and don't know where to start here are some ideas that may help you to get started on your own:
1. Select a theme for your album. Choose something that you have at least a handful of photos for.
2. Print your photos. I suggest you stick with photos that are 3x5 and smaller. I find it difficult to work with 4x6 photos in a mini album. As a rule, the more embellishments you wish to use the smaller your photos should be.
3. Start with the products you love, elements that will co-ordinate with the album you've selected. Don't limit yourself to only what you think you 'should' use, and grab more than you think you need. Gather it all, the assortment of goodies will inspire you.
Here's a peek at some of the product I started with.
![]() |
| As you can see not all of it got used, but it sure got my creative juices flowing, just seeing it all in one place like that. |
5. Enjoy the process.
At least these are the things that work for me.
I used a lot of miscellaneous bits and pieces from my own stash for this album. All the Amy Tangerine products, however are available in the store. So are the Maya Road canvas butterflies. Here are the links for easy shopping. While you're there, I'm sure you'll see some other fabulous goodies, perfect for your next mini.
If you are inspired to create a mini, please let me know. I'd love to come and have a peek.
Thursday, June 21, 2012
Sewing on Paper 101 and Teacher Thank You Cards
Hi everyone, I created these simple teacher thank you cards really quickly with the help of my sewing machine and lots of Cosmo Cricket Baby Jane goodies from the store. Many of you have told me that you find sewing on paper cumbersome or that it's difficult to sew a straight line on a paper project. I want to show you a video that I made; you will see just how easy it is. I'm far from an expert seamstress, so if I can do it, you can do it too.
Why machine stitch on paper, you say? I can think of a few reasons, it's fast, it's easy, it's super cheap and it adds so much dimension and interest to a page. Once you start doing it, you're not going to want to stop.
Here are my finished cards. I completed these two cards in about a half an hour!
Here is a close up of the stitching and stamping.
I hope that this video will encourage you to give machine stitching on paper a try. Really, it's fun! I would love to see your machine stitched paper projects.
Supplies
Thanks for dropping by!
Kate Vickers
www.scrapsation.com
Why machine stitch on paper, you say? I can think of a few reasons, it's fast, it's easy, it's super cheap and it adds so much dimension and interest to a page. Once you start doing it, you're not going to want to stop.
Here are my finished cards. I completed these two cards in about a half an hour!
Here is a close up of the stitching and stamping.
I hope that this video will encourage you to give machine stitching on paper a try. Really, it's fun! I would love to see your machine stitched paper projects.
Supplies
- Cosmo Cricket Baby Jane paper and Element Deck
- Ribbons by May Arts and American Crafts
- Thread
- Acid Free Glue by Helmar
- Stamps by Stampin' Up and Imaginisce
- Staples and Stapler (Tiny Attacher) by Tim Holtz
Thanks for dropping by!
Kate Vickers
www.scrapsation.com
Monday, June 11, 2012
Cosmo Cricket Evangeline Layout
Hi everyone! It's Kate here today, and I'm happy to now be back as an official member of the LCOM team!
This month, I'm working with Cosmo Cricket. I created this layout with the beautiful Evangeline line. I hope that you will check it out, it really is a beautiful line.
I fussy cut the flowers and the butterflies out of a single piece of paper, and layered them on top of one another with 3D foam squares. I love machine sewing on my layouts. Here, I did some machine stitching around the edges of the border strip and larger piece of paper on the left hand side of the page.
I used one of my favourite stamps from Stampin' Up as a background on the layout. I simply heat embossed the image with white embossing powder. To add volume to the butterflies, I applied Helmar Liquid Scrapdots under them. I find this works better than 3D foam on elements that you want to create a more natural looking 'pop'. I added a bit of splatter of Perfect Pearls Mist on the background.
Thanks for joining us today!
Supplies
- Cosmo Cricket Evangeline papers, chipboard and element deck
- Bazzill Kraft Cardstock
- American Crafts Thickers
- Perfect Pearls Mist
- Stamp by Stampin' Up
- Other: Brown pen, thread, white embossing powder
- Adesives by Helmar and Scrapbook Adhesives
Wednesday, June 6, 2012
Hi everyone! I am very excited to be back again for another term at Let's Capture Our Memories as a designer and co-ordinator!
This month, I will be working with some Lily Bee Designs product - all found in the Let's Capture Our Memories store! I have been dying to dig into these supplies and share with you!
First up is a page I did using one of my favorite things - little bits and pieces - I know this is not a new or unknown thing - but you really can do a lot with some little bits of paper to give them texture and depth!
I started off with this paper from the store from the Handmade line:
It was screaming for me to chop it up - not only is there tons of different patterns, but multiple colours too!
I love that! Here is what I came up with when pairing this paper with one of the Lily Bee basics papers (polka dot one side, grid the other):
I tried to add some texture by stitching the squares and adding a few buttons to them. I also used some of the papers from the Bag of Bits and layering some foam squares under them:
I added a few little flags that I made by stitching some folded paper together onto a sewing pin and clipping the ends to a pennant flag:
There is lots of Lily Bee Designs available in the store - check it all out HERE
Supplies used:
Monday, May 28, 2012
Cosmo Cricket Pre-School Layout
Hi everyone! It's Kate here today. I would like to share my latest single page layout done with Cosmo Cricket's Baby Jane line. This line is so versatile, not just for baby layouts. I used it for a layout documenting my son's second year of pre-school. I will likely use it again for a layout focused on my youngest daughter's first year of pre-school.
I started off this layout by cutting out the middle of this Cosmo Cricket Baby Jane paper. I backed this paper with some Bazzill Kraft cardstock and machine stitched the two papers together with a zig zag stitch.
I misted the Kraft cardstock with some Mr. Huey's mist and a Crafter's Workshop template. I stamped on top of the Maya Road canvas button with a chevron stamp. I used the Baby Jane paper as my title by cutting out each individual letter and inking the edges. I used the zero for my extra '0'. For my last hat trick, I applied some Versamark embossing ink around the edge of the Maya Road wood doily and then applied Wow embossing powder on it and heat embossed it. I love the effect this gave me. ... and that's all that I have up my sleeve for today...
Here is the completed project. Let me know what you think!
Here are the close ups.
Supplies
- Cosmo Cricket Baby Jane Element Deck
- Bazzill Kraft Cardstock
- Cosmo Cricket Baby Jane papers
- Maya Road Canvas Buttons
- Maya Road Vintage Wood Doilies
- Crafters Workshop Template
- Mr. Huey's mist
- Brads by My Mind's Eye
- Red embossing powder by Wow!
- Inks by Versamark & Stampin' Up
- Chevron stamp by Christie Tomlinson/Unity Stamps
- Ribbons by American Crafts, Stampin' Up and Hug Snug
- Adhesives by Helmar
- Other: thread, vintage milk bottle cap and pen
Wednesday, April 18, 2012
For the love of Prairie Hill
Have you noticed the New Pink Paislee
Collections in the store? They totally caught my eye, and I think they
look even better in real life. As soon as I saw the Hilltop sheet from
the Prairie Hill Collection, I knew I wanted to cut it into itty bitty
pieces.
I
had a feeling I would love it even more with a little cardstock
showing through. I used my paper trimmer to get nice straight lines,
placed them evenly on the cardstock,then glued them down one by one.
Isn't that kite the cutest?
This is the design I ended up with.
![]() | |||||||||||
| I apologize that the little stickers are difficult to read. They say "They make life even sweeter" The white ink text reads: "There are sure to be a lot of laughs when our families are together" |
I
left the layout like this for several days, despite felling like
something was missing. Then a couple of weeks later while showing it to a
friend I realized what was missing. I had the idea to add a few strips
of jounaling to the top right of the layout. So I pulled out some
Cosmo Cricket Tiny Type, and added sentiments that were
fun, matched the colours, and were appropriate for the photo of the
family I was featuring on the layout.
Here's a close up of the Tiny Text stickers.
Here
is the layout that is in my album today. I feel as though the little
journal strips finish it off much better, and add a little more
character to a page that's all about a family that's full of character.
Products used:
Prima wooden butterfly button
Jenni Bowlin butterfly punch,
Cosmo Cricket Tiny Text
Uni Ball white pen
American Crafts thickers
May Arts Jute
Jenni Bowlin tab punch
If by chance, this collection doesn't have you jumping up and down, I've got to let you know that there has been a ton of new product added to the store over the past couple of days. Some of which include, Smash, Crate, Amy Tangerine and much more. I would strongly encourage you to head on over and have a peek before it's all picked over.
Have a great Wednesday everyone!
Thursday, December 29, 2011
Major Bed Head
Major Bed Head
by Nicole Nowosad
Well, the Christmas holiday is now over - time to move onto the new year and new projects too!
I wanted to share you with you one last project using Echo Park Holly Jolly! This time, a very non-holiday themed page!
I love the bright colours in the Holly Jolly collection and really, there are lots of fun patterns that are not holiday themed at all - just change up your embellies a bit and there you go!
and I even added in some of last year's Echo Park Christmas line - it mixes so well with the new one! love that.
by Nicole Nowosad
Well, the Christmas holiday is now over - time to move onto the new year and new projects too!
I wanted to share you with you one last project using Echo Park Holly Jolly! This time, a very non-holiday themed page!
I love the bright colours in the Holly Jolly collection and really, there are lots of fun patterns that are not holiday themed at all - just change up your embellies a bit and there you go!
I added some pink twine from the Twinery in a carefree way around the photo.
In fact, this page was made using the 6x6 paper pad and NOT a full sheet! The 6x6 paper packs are a great way to get a lot of patterns for a little cash!
LCOM has some HERE - all different manufacturers are now making them.. and trust me, they are not just for the card folks out there!
I just love the Cosmo Cricket Tiny Type sentiments that you can pick up at the store. There are several available and add just the right little bit ;)
Supplies used:
Echo Park - Holly Jolly Collection
Twinery - Baker's Twine
Maya Road - Wood Snowflakes
Cosmo Cricket - Tiny Type stickers
Studio Calico - Tissue Paper
Don't be afraid to whip out that holiday paper on an "everyday" layout or card!
Make sure to share your creations with us in the gallery ! We love to see them!
Stay tuned for more great projects from the rest of the Marketing Team !
Subscribe to:
Posts (Atom)