Happy Friday friends,
I'm here today with a non-Christmas themed layout using Christmas papers. I fell in love with the All is Bright collection by My Mind's Eye. I love the colour, combo, and think it's a gorgeous one for Christmas, but also one that could be used all year round. Turquoise, cream, and red can be used for just about anything, including both male and female pages.
I especially loved this paper from the collection.
I cut it apart and stitched it back together leaving teeny bit of space in between each chevron for a really neat look. Here is the layout I created using the collection.
Notice the silver doily peeking out from behind. I found that little
gem at the bulk food store last week, and knew it would make a wonderful
addition to my doily collection. I don't know if doilies are a thing
of the past or not, but I can't seem to keep from adding them to my
layouts. I've also added some old Jillibean Soup alphabets, May Arts trim, Studio Calico mist, TCW mask, and some flair from my stash. You may rest your mouse over the photo to read the story behind the layout. You can find the All Is Bright Collection right here.
This will be my last post for Let's Capture Our Memories. I have thoroughly enjoyed my time here, and will forever be grateful to Tanya for the opportunity. Isabelle has done a fine job with the transition of ownership, and I know you all will be supportive of her as she continues to grow this sweet little community. I know she will be having a Marketing Team call in the near future, and suggest you keep your eyes peeled for the announcement. Thanks so much for popping in from time to time to see how I've used the products in the store, and especially to those of you who took the time to leave comments, they sure made my day. If you'd like to keep up with me you can find me on the web at http://faithandscraphappiness.blogspot.ca/ or on Instagram at http://instagram.com/sherrifunk
All the best, and may this weekend be a great one, as we look forward to a month of Christmas prep, and celebrations.
Showing posts with label Sherri Funk. Show all posts
Friday, November 30, 2012
Friday, November 23, 2012
You & Me
Happy Friday friends,
Have you seen the new Pink Paislee Portfolio Collection? I just love it. yellow, cream, and grey seem to be very big right now in the industry, and Pink Paislee mixes them perfectly in this new line. I had this photo of my little buddy Nyah and I kicking around since summer. I love this photo of the two of us. She is one great kid! I knew I wanted to create a great layout with this sweet photo of us. With this collection, and the help of my Silhouette Cameo, I think I did pretty good.
You can see the Portfolio papers in the shop here. I added some old Echo Park brads, and some mist from my stash to this layout as well as some flair from a fun new shop I discovered on Etsy. I hid the journaling on the tag with the pull out ribbon under the banner flair badge. It reads "I couldn't love this girl anymore if she were my own. I remember praying for her while she was still in China. She's been here 4 yrs now, and she blesses us all."
I hope you have a great weekend in store. I'll be back next Friday with my very last post as a member of the Marketing Team.
Sherri
Friday, November 16, 2012
Ready, Set, Go!
Last weekend, I had the privilege of traveling to Saskatoon, Saskatchewan with some girlfriends to attend my first ever Crop & Create event. It was fabulous to meet some new people, and especially cool to meet some industry leading celebs, like Kelly Purkey, Beth Kingston, Kelley Goree, and Catherine Tachdjian, just to name a few.
Amy Tangerine Ready, Set, Go is in the shop, and I thought it would be perfect to use on a challenge that I entered at the event. I created a layout boasting my need for a good morning coffee.
I chose to combine On The Clock and Dinner Date to create a fun, bright, and bold layout.
Journaling reads: "I couldn't agree more. My Starbucks ceramic mug is my best friend every morning of the week."
I used only 2 sheets of patterned paper, a mish-mash of alphas, and a few things from my stash. This line is so colourful, that I thought it would be easy to fulfill the challenge of combining several colours and styles of alphas to create an eye catching title. I'm sure you have a fair share of half used alphabet sheets too - this is the perfect way to use them up.
You can grab these papers, and a bunch more fab designs by Amy Tangerine in the shop here.
Happy Friday Friends!
Saturday, October 27, 2012
Tanya's Surprise Box Part II
Remember my surprise box from Tanya this month?
One of the items in the box was a Simple Stories 12x12 memorabilia pocket (pictured bottom left box, top left corner). I was wracking my mind trying to come up with an unconventional way to use this outside of my scrapbook.
In our home we have a lot of papers/notes that need a home from time to time. For example permission slips, or fund raising forms the girls bring home from school. There are also checks that need to be deposited, and letters/cards to be placed in the mail. Because my fridge is stainless steel, I can no longer use magnets to simply tack things onto the front of the fridge. We found a solution in the form of our garage access door. It's not pretty but it works as far as tacking papers that need to be returned/mailed/signed/deposited, etc to it with magnets. It works, but drives me crazy to look at.
Enter Simple Stories memorabilia pocket, ribbon, pins, and stickers. I used more of my mystery box items to create this...
A cute little pocket to hold all the 'stuff'. I simply use magnets to hold it to the door and voila, no more eye sore of a door every time I leave the house. Cute and functional.
One of the items in the box was a Simple Stories 12x12 memorabilia pocket (pictured bottom left box, top left corner). I was wracking my mind trying to come up with an unconventional way to use this outside of my scrapbook.
In our home we have a lot of papers/notes that need a home from time to time. For example permission slips, or fund raising forms the girls bring home from school. There are also checks that need to be deposited, and letters/cards to be placed in the mail. Because my fridge is stainless steel, I can no longer use magnets to simply tack things onto the front of the fridge. We found a solution in the form of our garage access door. It's not pretty but it works as far as tacking papers that need to be returned/mailed/signed/deposited, etc to it with magnets. It works, but drives me crazy to look at.
Enter Simple Stories memorabilia pocket, ribbon, pins, and stickers. I used more of my mystery box items to create this...
A cute little pocket to hold all the 'stuff'. I simply use magnets to hold it to the door and voila, no more eye sore of a door every time I leave the house. Cute and functional.
Monday, October 8, 2012
A Box Full of Surprise
Are you a little like me when you shop for scrappy goodies? I have a tendency to want only the newest items I can find when there are always great 'older' gems still to be had. If you've been following along for the past week you know that the Marketing Team were all sent 'surprise packages' to work with this month from the sweet Tanya. Here is a photo of my surprise box contents.
I knew that this would be the perfect month to scrap this photo of the lovely Nicole and I that I've had sitting around for a few months now. Seeing as they are both pieces of the same puzzle. I titled the layout "Just By Chance" as I believe that's truly how we met. Winnipeg is not all that big of a city. You've heard the phrase 'six degrees of separation'? Well in this city it's more like two. Somehow though, it took Let's Capture These Memories to bring us together. It has been so wonderful getting to know this girl. She's funnier than most, sweet, and more loyal than ever to her group of girlies. I thought it would be fitting to use Tanya's package of goodies to document this new found friendship.
I added a little mist, a doily, and some Lilybee alphas to complete the layout.
So what about you? Any 'oldies, but goodies' laying around your scrap room that you could be pulling out to create your next layout? As always, I'd love to come and have a peek if I've inspired you to create. I encourage you to come back next week to see what else I was able to create with this fabulous box of goodies.
Supplies used:
MME - Kraft Funday
MME Cardstock stickers - Dolled Up & Howdy Doody
October Afternoon - Patterned Paper
- Paid in Full
- Dictation
Love My Tapes - Narrow,white
I knew that this would be the perfect month to scrap this photo of the lovely Nicole and I that I've had sitting around for a few months now. Seeing as they are both pieces of the same puzzle. I titled the layout "Just By Chance" as I believe that's truly how we met. Winnipeg is not all that big of a city. You've heard the phrase 'six degrees of separation'? Well in this city it's more like two. Somehow though, it took Let's Capture These Memories to bring us together. It has been so wonderful getting to know this girl. She's funnier than most, sweet, and more loyal than ever to her group of girlies. I thought it would be fitting to use Tanya's package of goodies to document this new found friendship.
![]() |
| I used the tag to record my jounaling |
So what about you? Any 'oldies, but goodies' laying around your scrap room that you could be pulling out to create your next layout? As always, I'd love to come and have a peek if I've inspired you to create. I encourage you to come back next week to see what else I was able to create with this fabulous box of goodies.
Supplies used:
MME - Kraft Funday
MME Cardstock stickers - Dolled Up & Howdy Doody
October Afternoon - Patterned Paper
- Paid in Full
- Dictation
Love My Tapes - Narrow,white
Monday, September 24, 2012
Basically Bare Mini
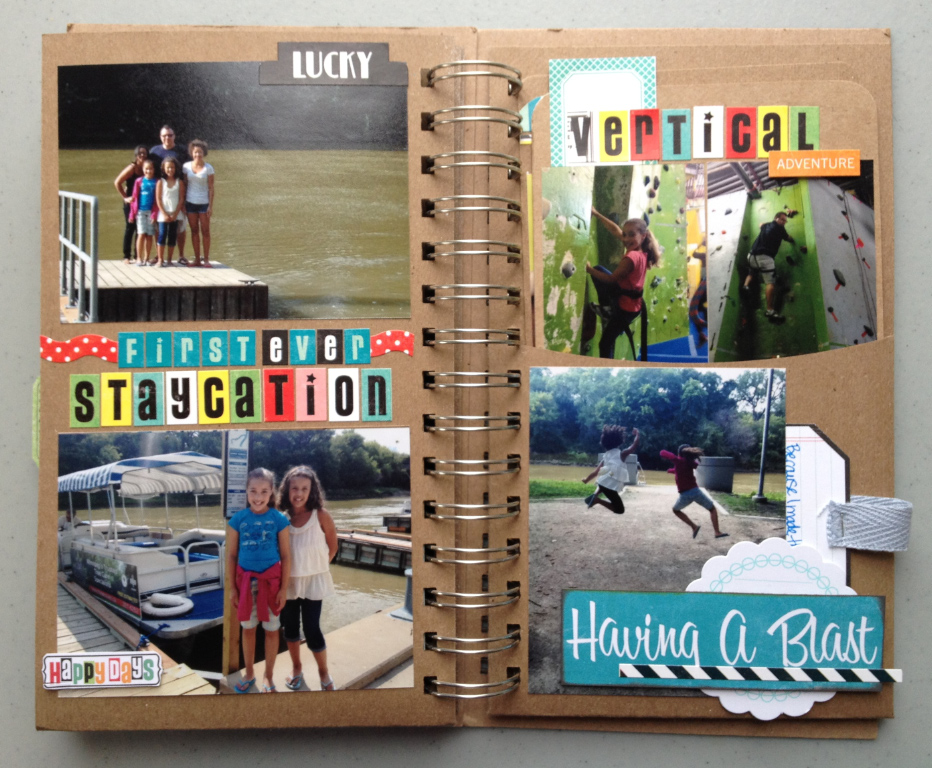
Today it's my turn to share with you the mini I created this month. I used the Basically Bare Polly Pocket Album & Echo Park Happy Days Collection.
I knew right away that I wanted to do a mini album of our Summer. So, I printed off my photos and off I went. I love the look of the 'naked' album. I find it super easy to work with. Where some may feel the need to cover the entire thing up with patterned paper, I actually like the look of the chipboard under my photos. Here's my cover. I used an old Pink Paislee Mask and some white Mr.Huey's, to create a little bit of pizazz to it. I felt the cover needed just a little something more without adding a bunch of patterned paper.
Rather than go into detail about every page, I'll simply let them speak for themselves. If you saw my Amy Tangerine mini, you'll remember that I love to add bits and pieces to my albums, mixing and matching different manufactures. I used the Echo Park Happy Days collection as my base, and added just a few little bits from my stash. For the most part all my embellishments are made of paper and/or stickers from the collection.
![]() |
| I combined a few photos using a brad for easy viewing under the "flip" sticker |
The album comes with five chipboard inserts for the pockets. It quickly
became apparent, however that I needed a little more for this project.
No problem. The pockets were wide enough to simply make a few more inserts out of scrap pieces of cardboard (from cereal boxes, etc) and simply add them in. Here is an example of just that. Both these pages fit in the same "Aug Long" pocket.
![]() |
| Front view |
![]() |
| Rear view of same inserts |
Here is another set of two.
![]() |
| Front view |
![]() |
| Rear view of same insert |
Even after adding a few more inserts, I still had a handful of photos that I wanted to include in the album. Solution: tape an envelope to the back page to hold said photos. Easy peasy.
You can see that even though I've added those extra pages, and the
envelope, that the album is not terribly thick. Still thin enough to be
easily stored on my shelf with the others.
The beauty of these little albums is how quickly they make creating a fun little keepsake. This album from start to finish took me about 3 hours. Sometimes I can spend that on one layout, so that gives you some perspective.
The entire Echo Park - Happy Days collection and several different varieties of Basically Bare mini albums are all currently available in the shop.
Hope you've been enjoying our Mini Album Month! There is so much new product arriving in the store these days, it's not hard to get inspired to create.
Happy creating friends!
Saturday, September 15, 2012
Easy Hidden Journal Tag
I often like to add journaling to my pages. Sometimes it's right out in the open on the layout, and other times it's hidden, either because of it's sensitive nature, or because I don't want to throw off the balance of the design. It can be tricky trying to figure out a way to hide your journaling. I almost always end up creating my own journal pocket. I usually sew a little pocket together, but today I'm going to show you a quick and simple way to create a pocket without a sewing machine.
The biggest help with this is some sort of narrow double sided tape. This one we sell in the LCOM store is nice and narrow, and really tacky, this would be perfect.
I either use a scrap of cardstock or an office supply tag as my journal spot. Sometimes you can even use an actual journal card, like I did on this layot.
I decided this time to decorate an office supply tag using stickers from this sheet in the Carta Bella Beautiful Moments collection.
I should note that I always create my layout first with exception of the journal spot. This will help me decide on size and placement.
To create/decorate the journal tag, I first cut the shaped journal spot sticker in half vertically. I then stuck in onto the end of my office supply tag. I used a scrap piece of cardstock to place under the sticker making it more durable, and keeping it from sticking to my layout, as this is the part I'll need to pull on to reveal the hidden journaling.
I then cut out the journal sticker from the scrap paper using my craft knife. Once that was completed I need to figure out placement on my layout.
To create the envelop. I simply used strips of double sided tape placed closely to the sides and bottom of where my journal spot will lie on the layout. This will create a natural little pocket once the matted photo and papers are stuck on to the layout, keeping the journal tag from sliding out of place.
![]() |
| What you're seeing is the reverse side of my matted photo cluster |
**Note** You will not remove the backing from these strips of tape as then the journal tag will tend to stick to the tape inside the pocket once it's placed on the layout. Leave the backing on, and you will not encounter that problem.
Add adhesive to the edges of the matted photo cluster and stick it to your layout. You are now ready to decorate the rest of the tag and add your journaling.
![]() |
| I used two more stickers from the Carta Bella sticker sheet |
Tuck your tag into your new formed pocket, nd you're done. Easy peasy, and no sewing machine required. Here is my finished layout.
See how journaling would have thrown off the design? This way I have a design I'm happy with and all the memories safely recorded on a hidden little tag.
Here are a couple more layouts that have hidden journaling done the same way.
Hope you've been inspired to give it a try.
All the Carta Bella product I used can be found in the store, here.
Happy Saturday friends!
Saturday, September 8, 2012
Welcome Back
Welcome to the weekend!
If you're anything like me you are feeling just a little more tired than you have been for the past two months. The start of the new school year always seems to arrive too quickly, and feels like a whirlwind of activity, with countless forms to be filled out and returned, and a the usual school newsletters, and other pertinent information to be reviewed.
For the past few years I have been making cards to send along with the girls on the first day of school. My hope is that a simple card will help their new teacher to feel valued and appreciated as he/she takes on a new set of students for the next 10 months of the year.
This year I created super simple "Welcome Back" cards using Lily Bee Design Double Dutch collection, and my hexagon punches.
Rather than my usual habit of creating one-of-a-kind cards, this year, I
decided to stick to the same design on all 4 cards changing it up just a
bit between the two colours.
Simple, yet cheerful.
Supplies used:
Some of the items are from my stash, like the white trim, and office supply tags, but the rest can be found in the shop.
Speaking of the shop. Have you noticed the Echo Park collections in there?
For The Record 2 - Documented & Tailored, as well as
have all been added and are ready for purchase. Hope you get a chance to head over there and grab some for yourself.
Enjoy your Saturday, and happy creating!
Monday, August 27, 2012
Amy Tangerine Day Book
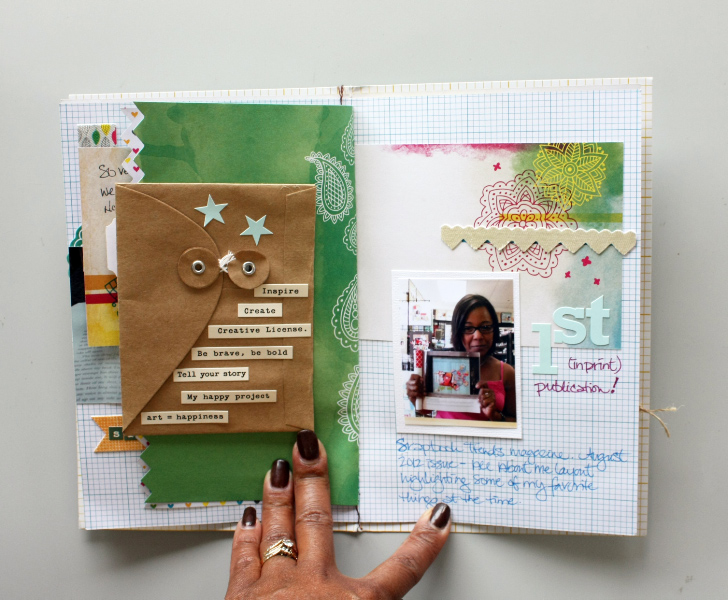
The Amy Tangerine Day books have been hot sellers since the moment they arrived on the scene. Although I really liked the look of them I was hesitant as to whether or not I would enjoy working with them, as the pages are a much lighter weight than I was accustomed to. Needless to say as soon as I began filling the first page all hesitations were washed away. The album was incredibly easy to work with.
I decided to use it to do a 'Book Of Me'. Here's the finished album.
I apologize in advance for my hand being visible in many of the photos. Photographing this little guy proved a lot more tricky than putting it together :)
![]() |
| Click on the images to enlarge |
![]() |
| the envelope houses the acceptance email from Scrapbook Trends |
![]() |
| The game day ticket is peeking out behind the page |
I've mentioned before how important I think it is to scrap about ourselves in addition to our family and friends. This little book will serve as a reminder in years to come of all the rich blessing my life held at this point. It may seem to go against the grain to do a BOM album in the middle of the year, but that's me, that's how I roll, and I find great freedom in scrapping whatever my heart desires, and not restraining myself to chronological order, or standard timelines.
If you struggle with mini albums and don't know where to start here are some ideas that may help you to get started on your own:
1. Select a theme for your album. Choose something that you have at least a handful of photos for.
2. Print your photos. I suggest you stick with photos that are 3x5 and smaller. I find it difficult to work with 4x6 photos in a mini album. As a rule, the more embellishments you wish to use the smaller your photos should be.
3. Start with the products you love, elements that will co-ordinate with the album you've selected. Don't limit yourself to only what you think you 'should' use, and grab more than you think you need. Gather it all, the assortment of goodies will inspire you.
Here's a peek at some of the product I started with.
![]() |
| As you can see not all of it got used, but it sure got my creative juices flowing, just seeing it all in one place like that. |
5. Enjoy the process.
At least these are the things that work for me.
I used a lot of miscellaneous bits and pieces from my own stash for this album. All the Amy Tangerine products, however are available in the store. So are the Maya Road canvas butterflies. Here are the links for easy shopping. While you're there, I'm sure you'll see some other fabulous goodies, perfect for your next mini.
If you are inspired to create a mini, please let me know. I'd love to come and have a peek.
Subscribe to:
Posts (Atom)