Showing posts with label ormolu. Show all posts

Tuesday, July 31, 2012

Make use of those decorative tags/tabs in your stash

this month, I picked up a whole bunch of tags and tabs from Elle's Studio and Ormolu available in the store.

Here are a few faves that I snagged:

from Elle's Studio


from Ormolu:

these products are great for many reasons - but what I love about them - is that these manufacturers follow the trends... the layered look, faux stitching and chevron. What's not to love!

Here is a page I made using products from these companies mixed with my Studio Calico papers:
 these were some Ormolu tags I snagged when they were on sale:
 love them layered with lots of paper and some washi tape too. check out the Elle's studio tag here:
 and add a tag to some twine by folding it over! instant tiny banner :)

Make sure you come back tomorrow to see what the marketing team has lined up for you...while you are waiting, why not stop by the store and pick up some new goodies from Basic Grey or American Crafts. 


Saturday, July 21, 2012

Take note part 2

I'll admit it - I love this paper - the soft patterns and versatility has hooked my completely and totally :)

Problem is - this paper is already sold out in the store - but I thought I would share my page anyway !

First up - I love this background paper - and not only is it in the Take Note pack, but as single sheets too as a Classic Calico Plano paper - and the best part is that it is still in stock!
 I added in some Elle's Studio and Ormolu tags to the page
 and made a few little flags with pieces of paper that co-ordinate! I used some Stick Pins as the base too!
 I used my paper mixing theory and randomly cut some hearts out of all the patterns in the package. I love the free formed hearts stitched and some foam square added behind them to made them 3D like.

There are lots of new things in the store that you could use to make this project! Just switch up the papers, use the same background page and go wild! Why not check out some new Heidi Swapp, Jillibean Soup or October Afternoon papers and use it instead!

Friday, July 20, 2012

Scrappin' Your Stash

The excitement of CHA can be felt all over the scrappy web.  It's always so exciting to see what our favorite manufacturers have come up with to delight our scrappy senses.  I know I'm not the only one who struggles with balancing wanting more new goodness and using up the goodness we still have in our stash.  As much as we want to bring brand new scrappy goodness into our home, we have a slight sense of guilt over all the scrappy supplies we still have piled up, staring us in the face ever time we sit down to scrap.  For today's post, I thought it may be a good idea to showcase a couple of ideas to help us use up some of that stash to make room for some of the new CHA goodness we've got our eye on.  So I gathered up my Crate Paper Pretty Party Collection pack, and some other random supplies that have been gathering dust in my space and got to work.
First an altered tin.  Add a little Mod Podge, eliminate a few things here and there, and voila a cute little tin for my 10 year old girly, girl to keep her treasures in.

Next up a layout.
This design uses 10 different strips of paper.  It's not a new design by any means but efficient in helping you to make a dent in that stash of yours.  Have a look and you'll see what I mean.
To create this design I began by using a lightweight piece of cardboard I recycled from my pocket page protector packaging.

I cut the piece of cardboard to 12" x 6.75".  I then marked the center point on the cardboard and drew angular lines about every two inches all the way around.
Next I sliced the pieces apart, and numbered them so that I could replicate it easily once the pieces of patterned paper were cut out.  This will also allow you to keep, and reuse the pieces over, and over again.
Because the traced pieces are always slightly larger than the original there will be a tiny bit of overlapping at the center.  This is easily covered up once you put your layout together.  I like the look of stitching on my pages, and this is a great design for it.
Remember we're trying to use up our stash, so I've layered several die cut shapes,  and boarder stickers that came with the collection around my photos.

And here is the final product.
 
The photos are from Tuesday when two of my longest standing friends came over for the afternoon. It had been a long time since we'd all been together. Hover your mouse over the photo to read the journaling.
I hope I've been able to inspire you to dig into your stash and put some of the scrappy goodness you've been hoarding, or just haven't gotten around to using, to good use.  What kinds of empty little containers have you been saving that could benefit from a little sprucing up with pretty paper, ribbon, and embellishments?  Canning jars?  Pringle tubes?  Little vases from the Dollarstore?  I'm sure you don't have to look too hard to find something.  And what about all those layouts you've been pinning, or adding to your 'favorites' folder that use a lot of little bits of paper and tags, or die cuts, or journal spots?  Maybe it's time to lift one and make some room in your stash for the new goodness that's sure to arrive in the store witin the next month or two.  If you do decide to tackle your stash we'd sure love to come and have a peek, be sure to link us up.

Happy scrapping!

Scrappy Goodness Used:
Crate Paper Pretty Party
Maya Road Vintage Butterflies
Maya Road Pins
Maya Road ribbon
Ormolu Chevron Tag
October Afternoon Sticky Keys
American Crafts Thickers
The Twinery Twine
3D Foam Squares
Other:
Petallo flower
May Arts Jute & Tulle

Tombow Adhesive


Wednesday, July 11, 2012

Take Note

I hope you are trying to stay cool in your part of the world!! Here in central Canada - the weather is SO HOT!! I am loving it... can't wait for my holidays in a few weeks so I can sit back and relax!

I wanted to share a project with you today using the Studio Calico line - Take Note
This month, I picked up the whole collection pack - right now there are 6x6 paper packs on sale for 50% off!!! You cannot beat that deal!

What I love about the packs is that everything goes - it is not matchy matchy too, which I do love, and the patterns are so grown up too!

I really wanted to use a lot of the papers in the collection all together... so I started chopping chunks and this is what I came up with:
 I made a sun ray pattern really randomly - I just cut down pieces until they fit.. I really am not a measurer- so it took a little fiddling, but it worked! Remember the tips I gave last month on mixing patterns - same rules apply here:
 I also snagged up some of the Elle's Studio tags to add to the mix too. the cute sentiments are just perfect for layouts and cards of all occasions:
 and another goodie in the store is the Ormolu tags! I added a few to the top and bottom of my page, along with a few stitched hearts:

And if these products are not enough for you - Tanya has completely lost her mind and put TONS of stuff up for sale in the store!! I am talking 50-75% off people!! Check it all out HERE or on our Facebook page. This is the perfect time to snag up some good deals on things you have been stalking the shopping page for!!

Friday, April 27, 2012

List Book

Hey there, everyone! It's Melissa here again with a little book I put together. I loved these little albums by Studio Calico and decided to use mine to create a book to keep lists together. I plan on using this to jot down items I need (groceries/home goods) through out the week; then, when I go to put together my list to shop from, I can remember everything I need to pick up!


To create this little book, I adhered the chipboard from and back to the ledger lined papers. To decorated this, I first used the butterfly rub-ons by Studio Calico along the right edge of the front piece of chipboard. Then, I layered a couple of journaling cards by Elle's Studio and adhered them to the front. I punched out a couple of circles from some Studio Calico pattern paper and then punched a starburst out of white card stock and then placed the Ormolu badge on top. I layered then on top of the wooden veneer pennants by Studio Calico. Simple and easy, but it makes a pretty book to keep my lists in :-)

Thank you, LCOM, for having me along on your blog this month!  I enjoyed my time and thanks to everyone who took a peek at my projects :-)

Wednesday, April 4, 2012

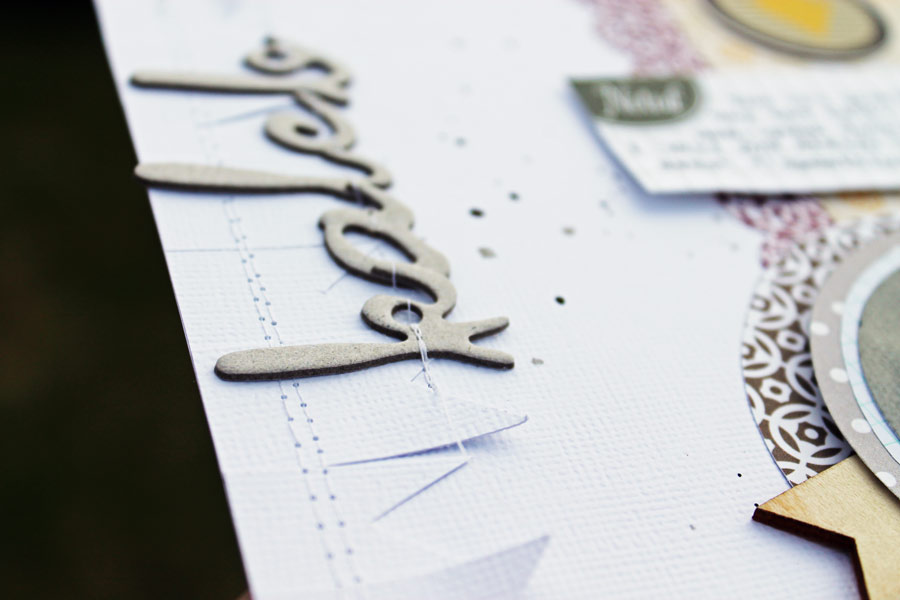
"Kaleb" by Melissa Mann

Hey, everyone! I'm super excited to be working with the LCOM marketing team for the month of April! I am going to be highlighting some products from Studio Calico, Elle's Studio, & Ormolu


To create this layout, I cute a piece of white card stock down to 81/2 x 11 inches.  I sprinkled it with some Mr. Huey mist and let that dry. I cut a block of the Studio Calico Heirloom paper and two strips of the opposite side of the Heirloom paper and stitched them all down vertically. I then punched circles from various papers from the Classic Calico collection and matted my pictures with them. I used foam tabs to pop them up off my layout. I then placed some of the veneer pennants and placed them underneath each circle in various places. I cut an Elle's Studio journaling card down and placed the "Remember This" under one photo and then used the other journaling block to type out my text. I used a couple of tags by Ormolu and adhered those down. The layout felt a little heavy to the right hand side, so I decided to cut strips of white cardstock and cut them into a pennant shape. I then ran my roller tape down the very edge of the left hand side and stuck my pennants on it. I cut off the excess and then ran my sewing machine down the length of it. Lastly, I placed my title "Kaleb" on top of the pennants and stitched it down.